Not too long after buying my 1999 Land Rover Discovery 2 TD5, the ABS warning lights illuminated on the dashboard. I did some research on Discovery 2 diagnostic tools and decided to buy a Nanocom, based mainly on price. Whether this was a good idea or not, I am still not sure. When I first used it it worked well, it showed me the ABS faults and allowed me to clear all the stored faults. I did have one problem with it in that I could not get it to communicate with the ECUs while the engine was running, but that didn’t seem too important.


When I came to use the Nanocom a short while later however, no matter how much I tried I could not get it to communicate with the ECUs even when the engine wasn’t running. At first I thought it must have become faulty, but when connected to a friends TD5 it worked successfully even with his engine running.
I contacted the guy who makes them and he told me that the most likely problem was with a poor ground connection on the ECUs. He also sent me a schematic for a circuit that allows the Nanocom to cope with the raised signal voltage that the poor ground creates.
Rather than hide the problem I set about finding the fault. I first of all cleaned the ground connections that are just behind the battery and engine ECU in the engine bay. That made no difference. Then I looked for the other ground connections for the ECUs, some of which are located behind the glove compartment on the left of the vehicle.
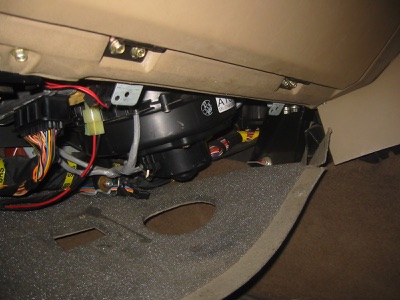
The glove compartment is fastened in place by four bolts on the hinges at the bottom of the door.
The view behind the glove box. Some ECUs can be seen on the left.
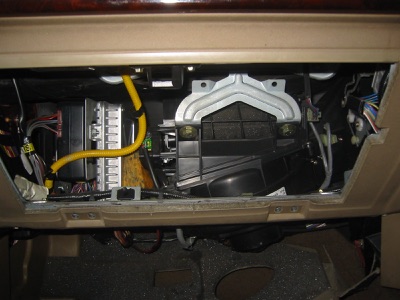
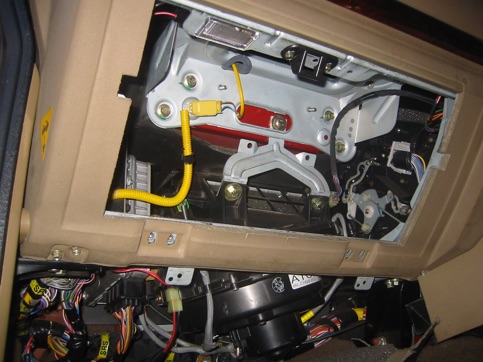
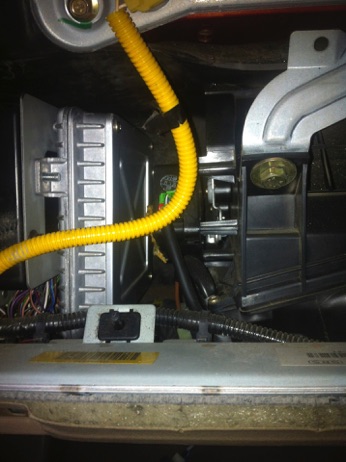
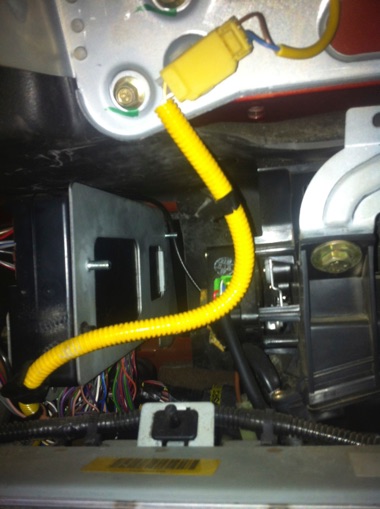
Looking at the circuit diagram for the Discovery, it appears that all the diagnostic ports of the ECUs all connect together, so I wondered whether a combined bad ground on all the ECUs was adding up to cause the problem. As an experiment, I disconnected the multiway plug from the ACE ECU just to see what would happen. The ACE ECU is the large silver box on the left of the photo above. The large black connector can be seen in the photo below.
To my surprise, the Nanocom started to work. Reconnecting the ACE ECU again stopped the Nanocom communicating with the ECUs. At least now I was heading in the right direction.
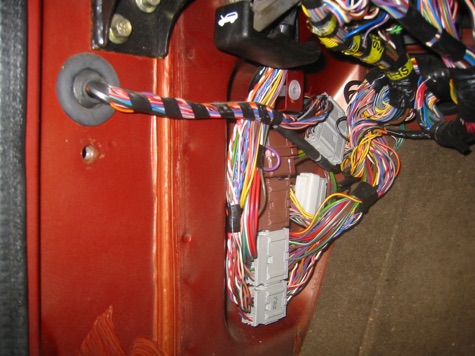
I followed the wiring behind the panel on the left side of the footwell, just below the glove box. The photo on the right shows the connectors hidden behind.

The ground connection for the ECUs behind the glove compartment can be seen in the photo on the left. It is the white multiway connector in the middle of the photo that is bolted to the metal body panel.
After disconnecting the battery, I unbolted this ground connection and unplugged the connector. I sprayed some contact cleaner in the connector and made sure the bolt was clean. I also put a couple of crimp connectors onto a thick piece of wire and connected this ground connection to another bolt in the footwell, just to make sure there was nothing hidden out of sight causing the poor connection. Unfortunately after all this work, the Nanocom still didn’t communicate with the ECUs while the ACE ECU was connected. I am now going to have to do some more investigating to work out what is going on. It could possibly be the ACE ECU that is causing the problem, but the ACE does appear to be working fine in all other ways. I will try disconnecting each ECU in turn to see if that makes any difference. I will also try connecting my oscilloscope to the diagnostics connector to have a look if the signal voltage is simply being shifted high or if the signal is missing all together.
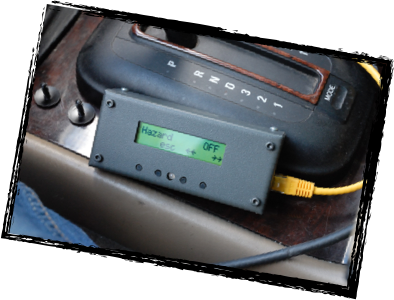
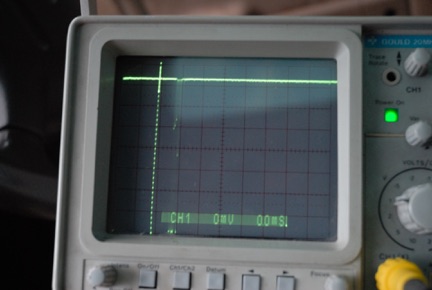
I decided to first try connecting my oscilloscope to the diagnostic connector while the the Nanocom was connected to see what signals were present.
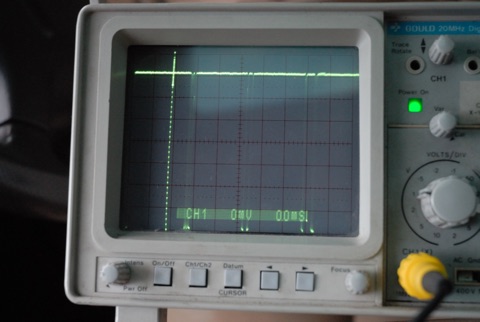
The trace on the left shows the signal while the ACE ECU was plugged in. You can see the signal transmitted by the Nanocom, but there is no response from the engine ECU.
The trace on the right shows the same signal while the ACE ECU was unplugged. You can see the signal transmitted by the Nanocom, followed by the response from the engine ECU.
Looks like I don’t have a problem caused by a poor ground connection. I need to decide whether the ACE is causing the problem or not.
A search on Ebay revealed that second hand ACE ECUs are very cheep to buy at the moment. £20 for a replacement ECU seemed worth risking to test my theory that the ACE was causing my Nanocom communication problem. This photo shows the old ACE ECU during the process of removal. There are three nuts holding the ACE ECU in place, one visible and two further forward near the bulkhead.
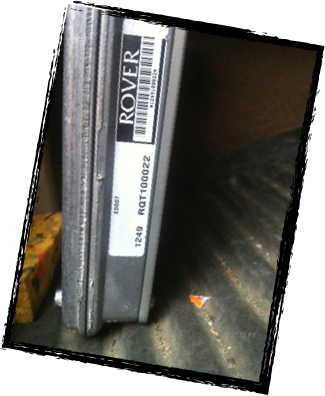
This photo shows the ACE ECU removed. Visible in the background is the top stud that is quite difficult to get to to remove the nut. I needed to move two relays out of the way so that the ECU could be slid off the studs. The photo below shows the part number of the original ECU.
Before I bolted the new ACE ECU in place, I plugged the large connector into it and tested the Nanocom. The Nanocom worked without any problems. I will have to open the original ACE ECU and see if there is anything obviously wrong with it, but for now, the car can be put back together knowing that if I need to, I can use my Nanocom without any problems.